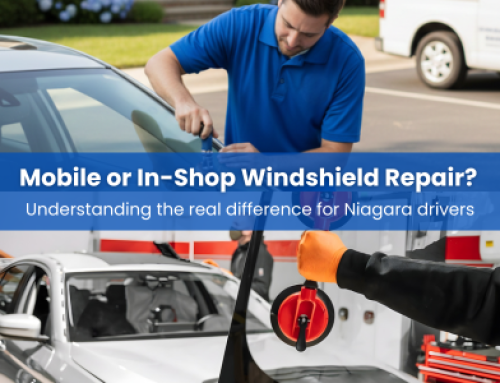
We’ve all seen them at the auto parts store or the checkout counter at the gas station: the DIY windshield repair kit. They promise a “good as new” fix for a few dollars and twenty minutes of your time.
If you have a tiny, shallow surface pit, these kits can sometimes do the job. But for many drivers in Burlington, a DIY attempt on a legitimate rock chip often ends in frustration. You follow the instructions, cure the resin in the sun, and the chip looks better—until a week later, when a cold snap hits and that “repaired” chip suddenly shoots a crack halfway across your viewing area.
Understanding why these kits fail on specific types of damage isn’t about discouraging DIY; it’s about knowing the physics of auto glass so you don’t waste time on a repair that won’t hold.
The Chemistry of Failure: Viscosity and Pressure

The main reason over-the-counter kits fail isn’t necessarily user error; it’s the equipment. To successfully bond glass back together, two things must happen:
- Air Extraction: All air must be vacuumed out of the break.
- Resin Injection: Resin must be forced into the microscopic cracks under high pressure.
DIY kits rely on a simple plunger system generated by your hand or a small suction cup. While this creates some pressure, it rarely creates enough force to push resin into the tightest tips of a star break or a complex crack.
Furthermore, most kits come with a “one-size-fits-all” resin. In a professional setting, we select resins based on the ambient temperature and the specific type of break. A resin that is too thick won’t flow into the cracks; a resin that is too thin won’t provide the structural strength needed to hold the glass together on a bumpy drive down the QEW.
The “Impossible” Chips for DIY Kits
Not all chips are created equal. While a simple “bullseye” (a clean, circular break) is the easiest to fix, other types of damage are notorious for causing DIY kits to fail.
1. Star Breaks
These look like a small point of impact with short legs radiating outward. Those legs are incredibly tight fissures in the glass. Without professional-grade pressure cycling (alternating between vacuum and injection), the resin simply sits on the surface. It caps the top of the chip but leaves air trapped in the “legs.”
The Result: As soon as the temperature drops, that trapped air contracts, and the glass stresses, causing the legs to spread.
2. Combination Breaks
This is a mix of a bullseye and a star break. There is often crushed glass in the center. DIY kits rarely have the ability to drill out or clean the crushed glass effectively. If resin is applied over glass dust, it bonds to the dust, not the windshield itself.
The Result: The repair looks cloudy and eventually crumbles, leaving the impact point exposed to moisture.
3. Cracks Near the Edge (The Frit)
The black band around your windshield is called the frit. This area is under the highest mechanical stress because it’s glued to the frame of the car.
The Result: A chip here requires a specialized resin with higher tensile strength. A generic kit usually cannot withstand the body roll and chassis flex of daily driving.
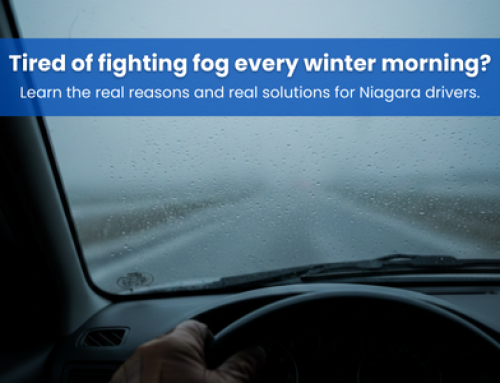
The Burlington Factor: Weather and Roads
In a constant 20°C climate, DIY windshield repairs might work more often. But Southern Ontario winters tell a different story due to repeated freeze-thaw cycles.
In places like Burlington and the Niagara Region, a mild afternoon can quickly turn into a freezing night. If a DIY repair leaves even tiny air pockets, moisture from rain, snow, or car washes can seep in. When that moisture freezes, it expands—causing small chips to spread into large cracks, often turning a simple repair into a full windshield replacement.
Because the glass has already been compromised by the initial impact, it cannot withstand that internal pressure. This is the most common reason we see a small, reparable chip turn into a situation requiring full windshield replacement in Burlington. The expansion splits the glass, rendering the repair impossible to redo.
The “One Shot” Rule
There is a critical limitation to windshield repair that most kit manufacturers don’t mention on the box: You generally only get one shot at it.
Once you inject resin into a chip and cure it, that pathway is sealed. If the resin didn’t penetrate all the way to the bottom of the break, or if it didn’t fill the star legs, you cannot go back and add more resin later. The cured material blocks the entry point.
If a DIY repair fails, a professional technician usually cannot fix it. The only option left is to replace the entire windshield.
When to Call a Professional
With over 20 years of experience handling auto glass, we know that safety and visibility are the priorities. Professional repair isn’t just about making the chip disappear; it’s about restoring the structural integrity of the glass so it reacts correctly if your airbag deploys or if a stone hits the same spot again.
It is generally smarter to skip the kit and seek professional windshield repair in Burlington if:
- The chip is in your direct line of sight.
- The damage has “legs” or radiating cracks longer than a few millimeters.
- The chip is smaller than a toonie but deep enough to catch your fingernail.
- You want the peace of mind that comes with using top-quality adhesives and proven methods.
Saving Your Windshield
A proper repair takes about 30 minutes, costs significantly less than a replacement, and prevents the damage from spreading. While DIY kits have their place for minor surface blemishes, trusting the structural glass of your vehicle to a plastic plunger can end up costing you more in the long run.
If you have a chip that looks suspicious, or if you aren’t sure if it’s repairable, let us take a look before you apply any store-bought resin.
Need an honest assessment of your windshield? Call Star Windshield today at 647-509-2154. We’ll help you determine if a repair is safe, or guide you on the next best steps.